Book multiple pickup locations to one shared dropoff
Use this workflow when several pickup locations or depots need to deliver to the same dropoff address. You will add all pickups first, set one shared delivery address, then either keep one shared delivery contact and combined item list or split the details by pickup before calculating the route price and continuing from Price & Review.
Open the public quote page or start from the customer portal
You can begin from the public Shifts Route Pricing page, or if you are already signed in as a customer, use the Get a Quote tab or the Book a Shift button.
Several pickups, one shared delivery point
This guide focuses on one common dropoff location receiving items from multiple pickup locations. It now shows both options: one shared delivery setup with combined items, or separate details for each pickup.
Before you start
- Know the pickup/dispatch date and start time.
- Have every pickup address ready.
- Have the one shared dropoff address, delivery contact details, and item dimensions ready.
Key setup for this workflow
Because all selected pickups deliver to the same destination, you can either use one shared delivery contact and one combined item list, or choose the separate-by-pickup path when each pickup needs its own contact details, return/dispose setup, or item details.
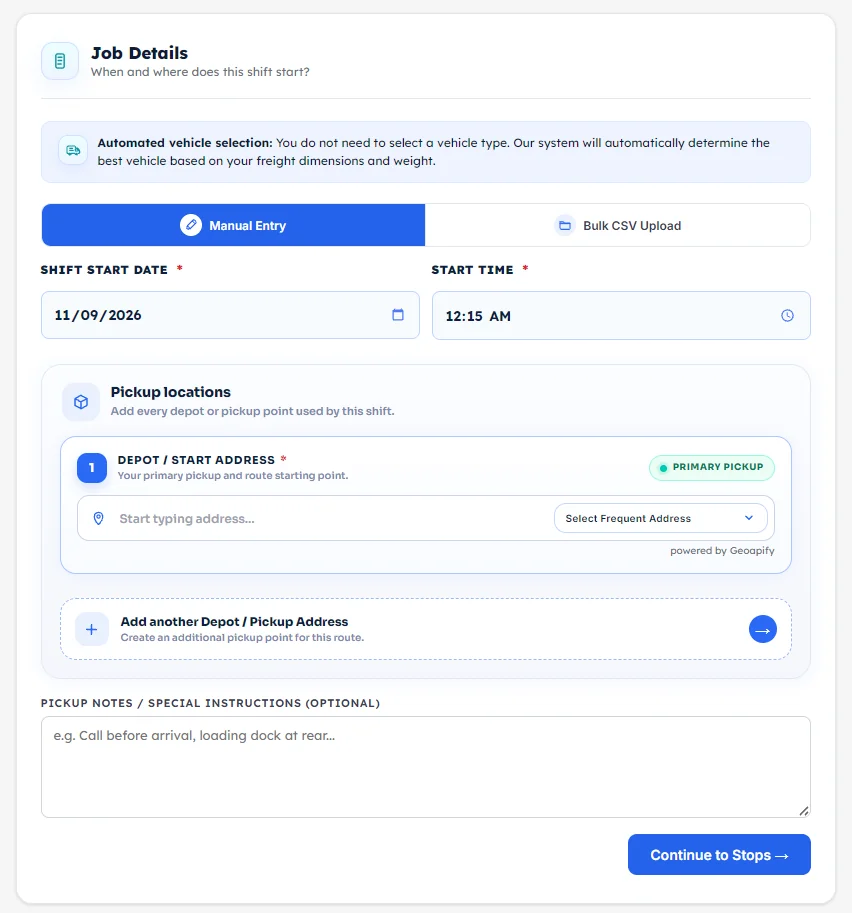
Choose how to start the quote and set the shift date and time
You can go directly to https://custm.com.au/shifts-route-pricing, or if you are logged in as a customer, open the Get a Quote tab or click Book a Shift from the customer portal. In Job Details, choose either Manual Entry or Bulk CSV Upload, then fill in the Shift Start Date (pickup/dispatch date) and Start Time.
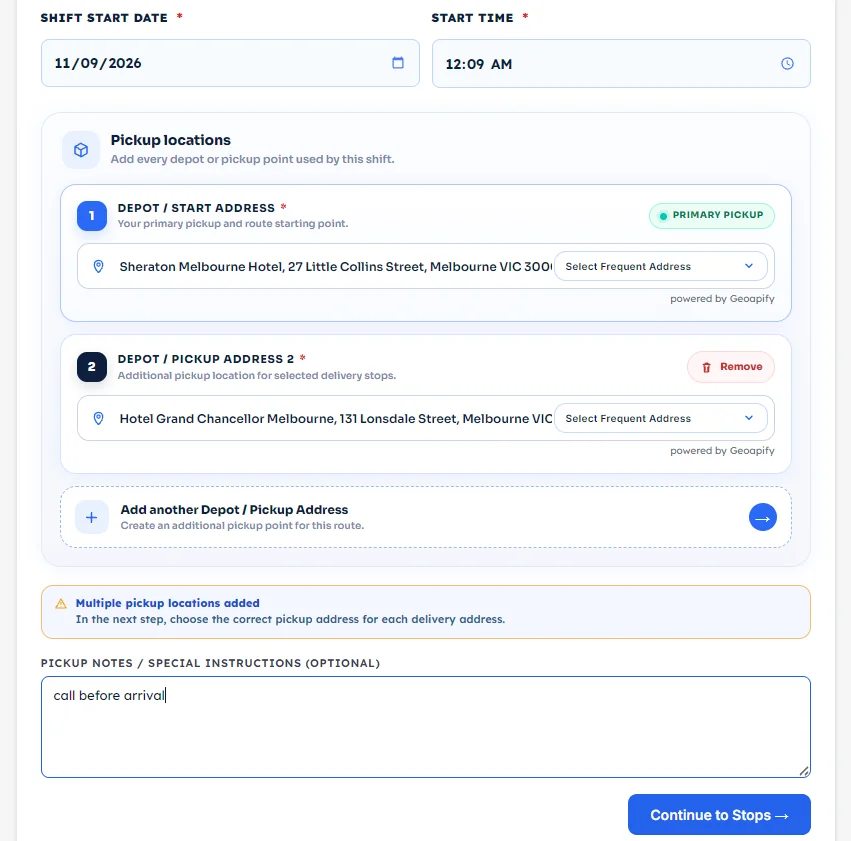
Add all pickup addresses on the Job Details page
In the Pickup locations section, add your primary pickup first, then add every extra depot or pickup address needed for the route. When required, add your pickup notes or special instructions in the notes field below.
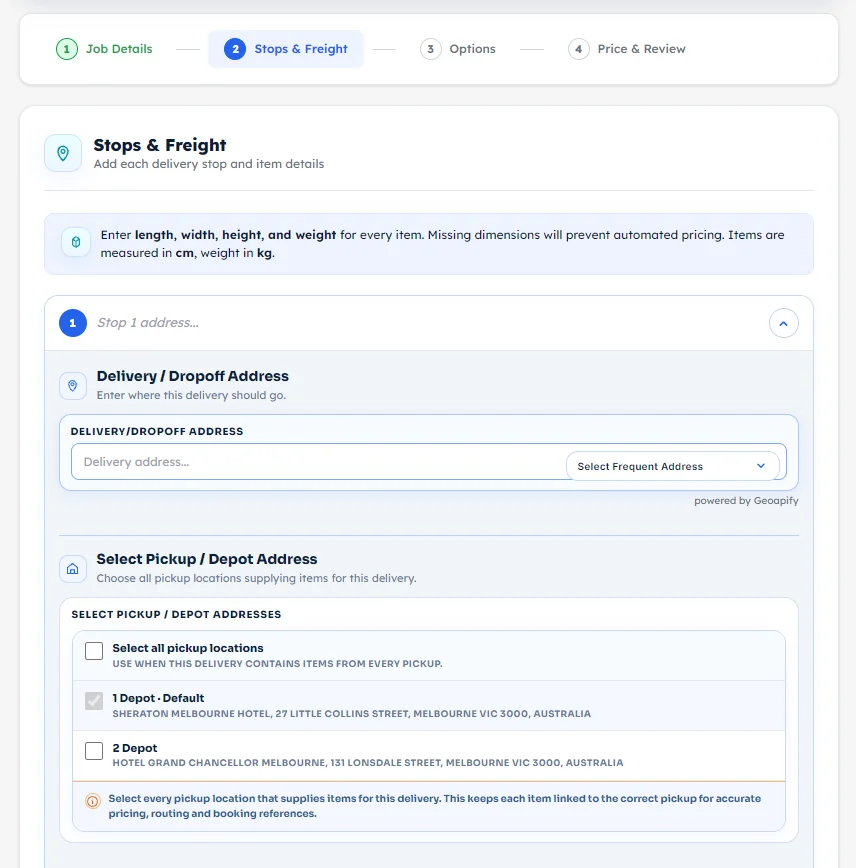
Enter the one shared dropoff location
On the Stops & Freight page, enter the dropoff address in the Delivery / Dropoff Address field. This address is where the items from both pickup locations or depots will be delivered.
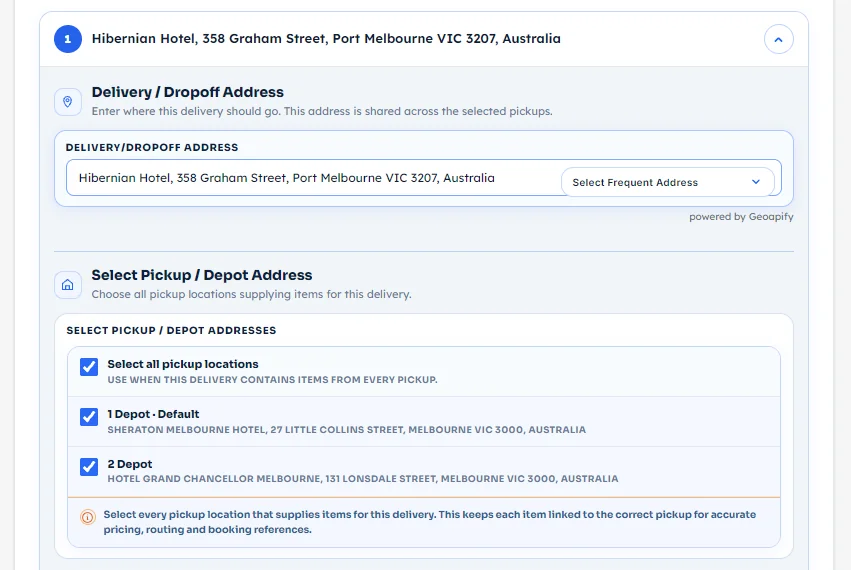
Select all pickup locations that supply this one dropoff
In the Select Pickup / Depot Addresses section, choose every pickup location that is sending items to the shared delivery address.
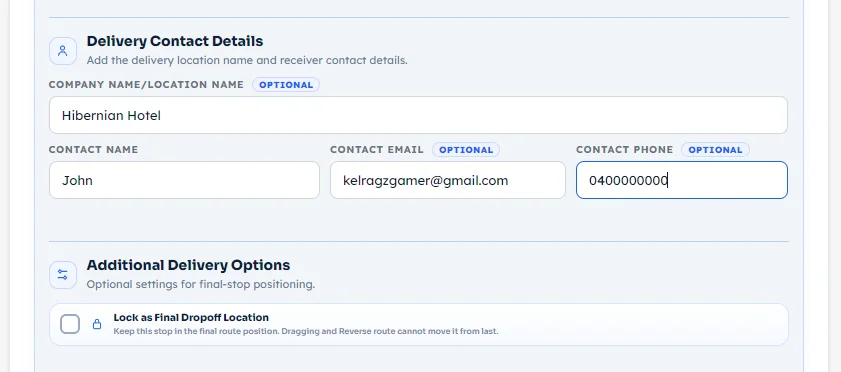
Fill in the delivery contact details
In the Delivery Contact Details section, add the company or location name when relevant, then enter the contact name, contact email, and contact phone for the shared dropoff location.
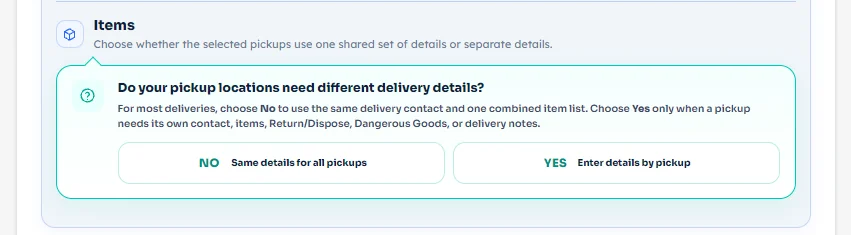
Choose NO when you want one shared delivery setup
In the Items section, the system asks whether your pickup locations need different delivery details. If you want one shared dropoff with no separate contact info for each pickup, choose NO.
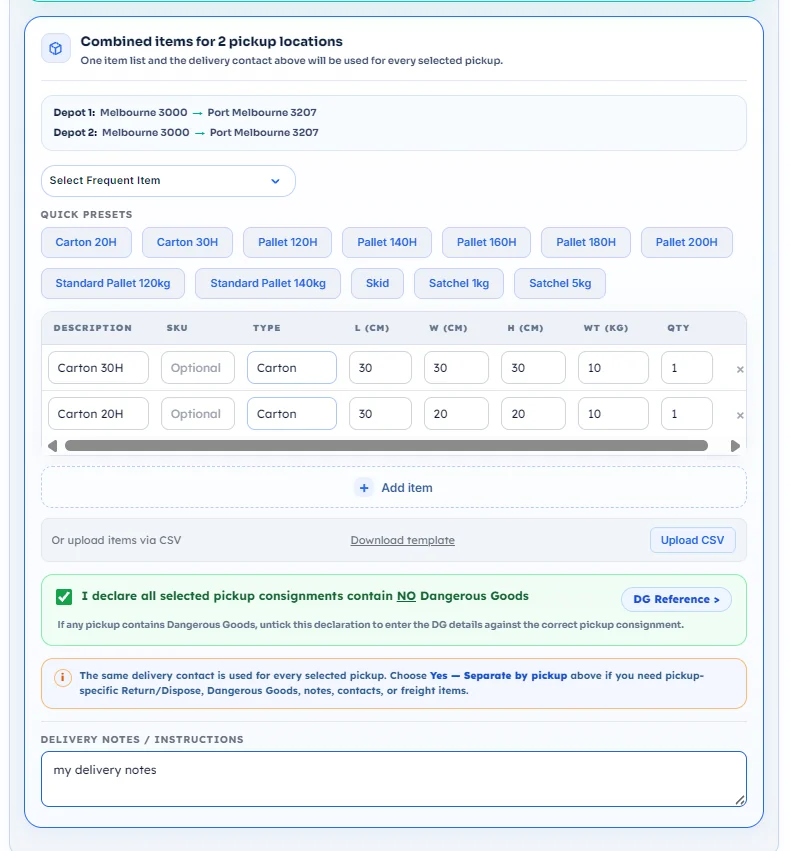
If you chose NO, add all items in one combined list
After choosing NO, the page switches to the combined-items layout. Add all items in one go in the Combined items section, rather than separating items by pickup. You can use frequent items, quick presets, manual rows, or the CSV tools to build the list.
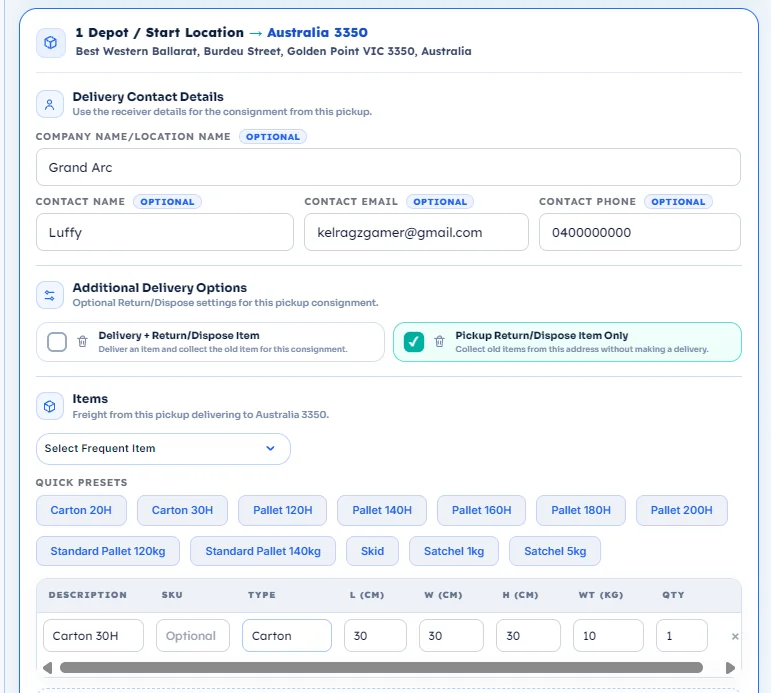
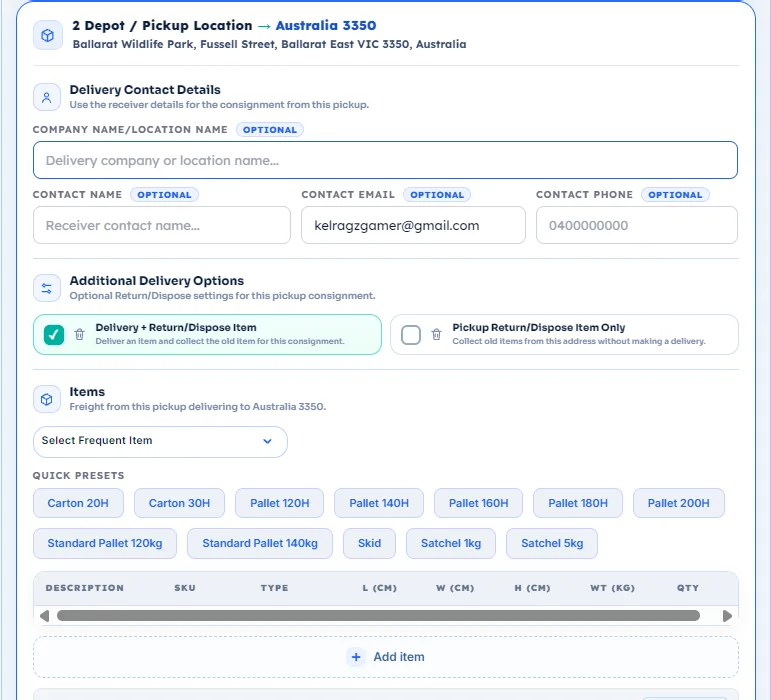
Choose YES when each pickup needs its own contact details and items
If each pickup location needs its own delivery contact details, return/dispose settings, or item list, choose YES. The page will split into separate pickup panels so you can complete each pickup consignment individually.
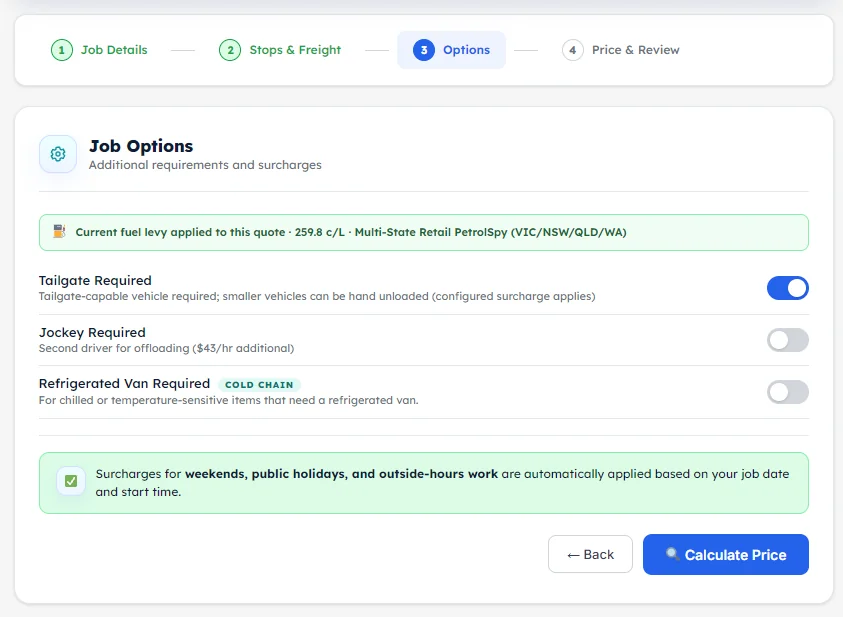
Select the options that apply and calculate the price
On the Job Options page, choose the delivery options that apply to your booking, such as tailgate or other special requirements. When your options are correct, click Calculate Price.
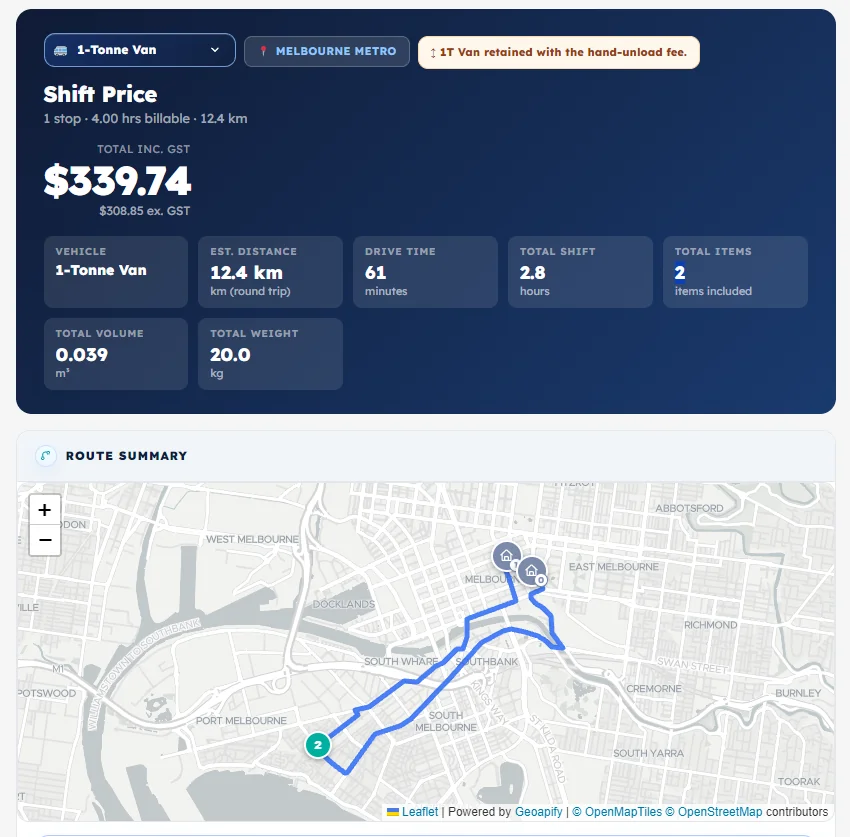
Review the price, route summary, and continue to the next booking step
After pricing is calculated, you will be redirected to the Price & Review section. Review the total price, vehicle, distance, route summary, and the map. If everything looks correct, continue to the next booking or payment step that applies to your session.
Your multi-pickup shared-dropoff booking flow is ready.
The end-to-end workflow is now clear: start the quote, add all pickup locations, enter one shared dropoff, select every supplying pickup, then either keep one shared delivery contact and combined item list or complete separate pickup sections before calculating the price and continuing from Price & Review.